
Lego brick tissue box cover


There's a really nice looking tissue box cover on Ravelry, it's modeled on a Lego brick. And the pattern is free!

I've switched to cheap Tesco Value tissues for my desk at work. Hiding the box with a quirky crochet project seems like a great idea. And looking at the pattern there's not too much sewing to do (well until I get to the bumps of the brick). 

It's also a good project as I'll need a clean desk in order to show it off once it's finished. Right now my desk is not really ship shape. 

The pattern is basically just chaining and doing double crochet (UK) /  single crochet (US) until the work covers half of the top. then you can use some chains to make a gap big enough for the tissues. Carry on as before. Once it covers the top the pattern suggests working around the rectangle in half-trebles (UK) / half-doubles (US). I think I'm going to stick to one stitch throughout. Although I am pondering whether I should work in the back loops only on the first perimeter round, just to ensure I get an definite "fold" in the brick. 

Lunch break 1: 

Lunch break 2

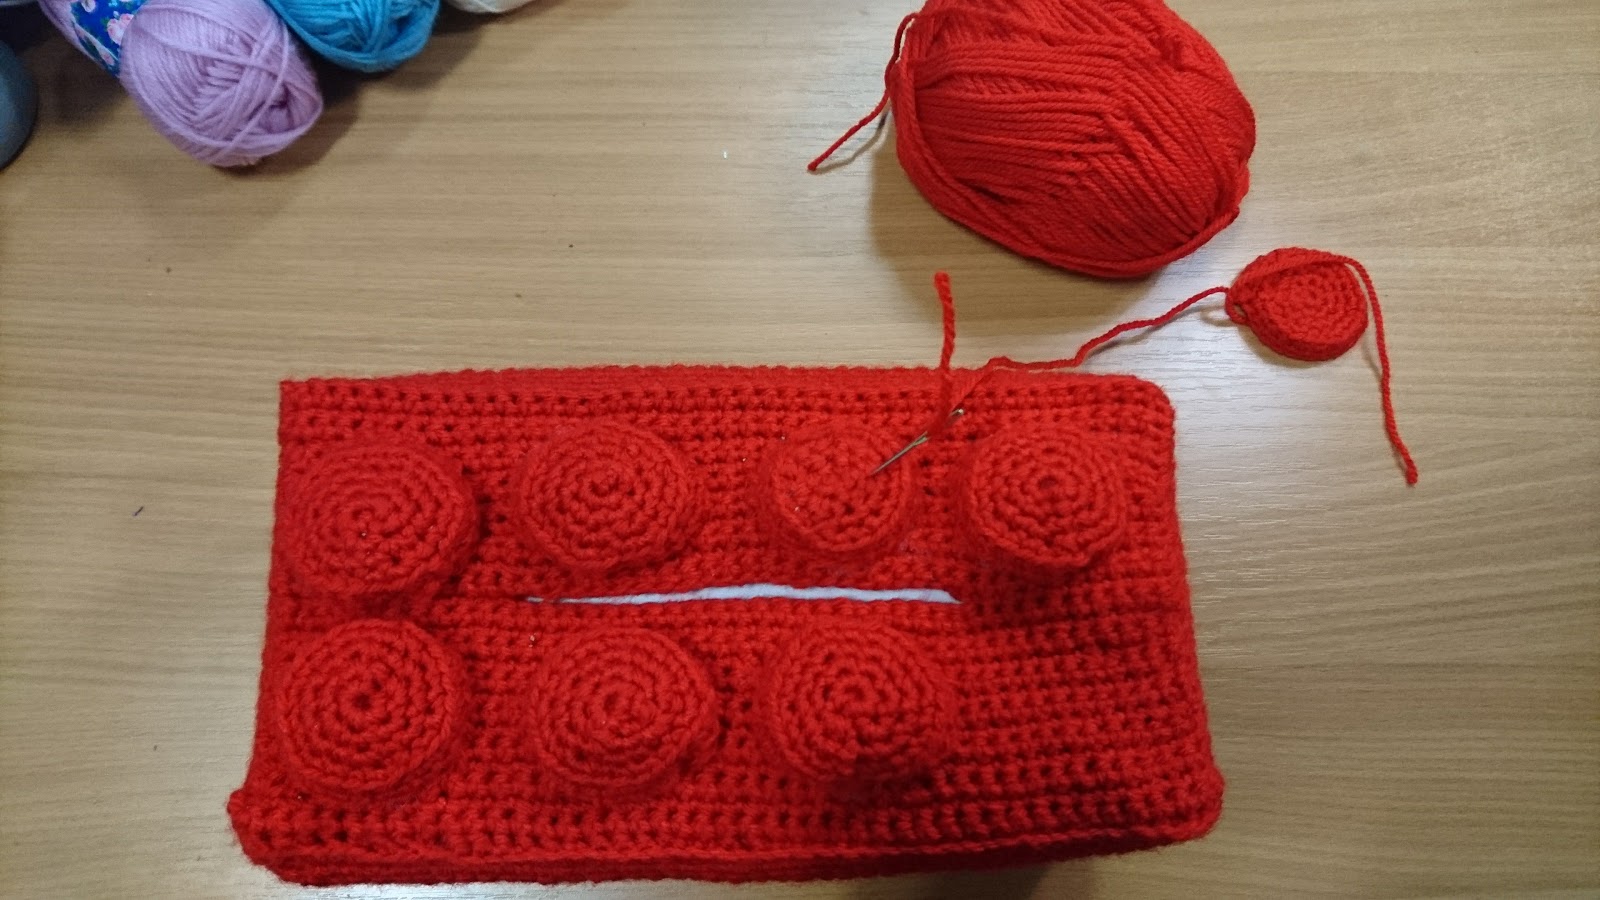
Another lunch break and I have enough to cover the top of the box, so it's time to progress to crocheting around the whole piece.


I've decided that I will work into the back loops only for this piece. At least on the long sides where it's possible. That should create a definite ridge which will help the crochet fold.

Another couple of lunch breaks and I've got enough done to see that it will fit! Phew.

Sadly I got myself a bit muddled at some point. I'd been working the rounds all in the same direction: but I must have switched direction twice - as there's a band with a different texture around the brick. 

The studs for the top of the brick are really quick to work. I followed the biggest size given in the pattern (so 4 rounds of stitches). I'm glad I popped a ridge on the brick itself as the pattern calls for a ridge on the studs.


And finished at lunchtime today! I still haven't tidied my desk - so here it is on another desk!


My mother has already put in her order for 3 tissue box covers!

Summary
Yarn:
Grundl Lisa Premium (2 50g balls)
Hook:
3.5mm
Lesson learned:
Pay attention to counting the chains when creating the gap. 
TV watched:
Nothing 😶 It's a lunch-break project

Comments

Popular posts from this blog

Safiya Jumpsuit

I'm a bit late to the jumpsuit party. I'm sure they've been cropping up more frequently, in fashion and in patterns, for at least a year. But the first ones I saw had the shape of boiler suits in a lighter fabric. I actually quite like that shape, but I wasn't ready to dive straight into that! My most recent SewHayleyJane box came with viscose crepe based on an Italian wallpaper pattern. Although to me it looks like Delft fireplace tiles ! And I had received the latest Tilly and the Buttons book from my Mum for Christmas, so it was about time I did something from that. In the book there's a hack to make the Safiya trousers into a playsuit, and a hack to pop pockets in. So I sorta half-hacked the playsuit - after all I wanted the long legs of a jumpsuit. Side note: is that the difference - just long v short legs? Either way, I wanted the long leg style. I quite like the idea of the mock-wrap bodice. Doing the half-hack version did mean a bit of jumping around in th

Shelby dress

Ever since I saw Liz’s ’ 90s ditsy grunge ’ tea dress in the Great British Sewing Bee, I'd been planning to do something similar. I used to live in black dresses of that ilk when I was a teenager.  But I also don't want to buy new fabric now - I have plenty! So instead of a black dress, I've done a summery dress with cotton lawn fabric from a Sew Hayley Jane box.  The Fold Line suggested the True Bias Shelby as the pattern that Liz had been using. So I grabbed a PDF of that, and got to sticking/cutting. I'm using View A, which is the mini-dress. I am also interested in the full-length romper (View D).  Sizing and adjustments:  I normally manage to cover 3 different sizes with my bust/waist/hip measurements: but my waist and hips fell on the same size in this pattern, with my bust just one size smaller. Bonus! And with the princess seams going up to the bust I decided to just do a single size, and adjust the princess seam if needed. On the model the skirt seems a litt

Filet crochet: pansies (part 1)

For a change I've decided that I'd like to try a new style of crochet... filet crochet. In its most easy form this uses just two crochet stitches to build up a grid of empty or filled-in squares, allowing you to make a blocky pattern. Using smaller yarn than normal, mostly called cotton, allows you to make the blockiness less obvious. I decided to do some example items just to see how large they will work up. Here's the biggest cotton I could find. It needs a 2.5mm crochet hook to work it  - which is one I happened to have already. You can see the difference in hook sizes and yarn/cotton in this picture. I also had fun doing searches on Pinterest to find a pattern that I thought would give me a good idea of gauge. Most of these don't look like normal crochet patterns. Instead they look like graphs/grids. Since filet crochet only uses two stitches the pattern can be simplified a bit. The two stitches are a treble and a chain (or in the US you'd do a double