Sorry I've been quiet! Just as I was resurrecting the blog too. I ended up interviewing for and getting a temporary job. I've also been making masks for friends and family.
Here's an in-progress pic of a mask. I've made these so the wearer can thread through elastic and trim it to fit them nicely. When I'm making a mask for myself I can skip a few of the steps!

So I don't have quite as much time, but I am still sewing clothes as well as masks. Although the latest item comes with a matching mask!
I've done a view of New Look 6407 before (view A: long sleeved, straight collar). It wasn't great - despite the 'easy' rating from New Look! The collar was a struggle - and is too pointy in a very seventies style! I've completely messed up the sleeve cuffs too. So in the latest attempt I tried to get rid of these issues by going for View E, with a mandarin collar and short sleeves. I always struggle with the size: I tend to fall on three different sizes, depending on whether I measure bust, waist or hips. This time I kept it simple and just cut my largest size (the waist). I should have perhaps graded this, since my bust is two sizes smaller than my waist - but the pattern pieces made this a little more difficult since the two sizes I needed were on completely different bits of paper!


Here's an in-progress pic of a mask. I've made these so the wearer can thread through elastic and trim it to fit them nicely. When I'm making a mask for myself I can skip a few of the steps!

So I don't have quite as much time, but I am still sewing clothes as well as masks. Although the latest item comes with a matching mask!
I've done a view of New Look 6407 before (view A: long sleeved, straight collar). It wasn't great - despite the 'easy' rating from New Look! The collar was a struggle - and is too pointy in a very seventies style! I've completely messed up the sleeve cuffs too. So in the latest attempt I tried to get rid of these issues by going for View E, with a mandarin collar and short sleeves.


I used my fabric from the June 2020 SewHayleyJane box, it's 100% cotton, and called Cherry Picking. It looks great! It's much better fabric than I'd buy myself. I'm still too worried about making mistakes so I tend to buy cheap fabrics.

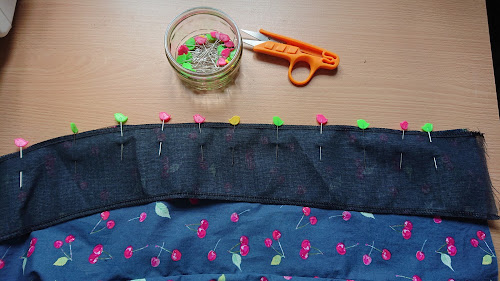
I'm OK on doing the seams along the shoulders and the side seams. But the next stage was the collar. And even though it's a much simpler collar than normal, I still had to do it twice.
I ended up not following the instructions, and looking up various explanations on Google, and then just winging it! So I
- attached the front facing before doing the collar,
- pinned the interfaced collar piece along the neck and marked where the front came to on each side,
- unpinned,
- sewed the two collar pieces along their top seam: to the marks,
- graded the seam and notched the curves,
- ironed a seam on both collar pieces,
- sewed the collar on with a just about an eighth of an inch from the folded bottom of the collar.


Also, I didn't forget to make sure I popped in my custom labels. Because I'm vain!
The sleeves went in easily! At least that part was much simpler in View E. A fair chunk of hemming followed, then the exciting part was picking buttons!


I regret doing the button holes with the same black thread I used for everything else. It just looks a bit dark when it's so thick! But that one problem aside I think this top came out really well.

And the bonus is there was plenty of fabric to make a couple of matching masks, and probably still get another top out of this.
| Summary | |||
| Pattern: | New Look 6407 | ||
| Fabric: | 100% Cotton, cherry picking | ||
| Lesson learned: | Redoing a collar will be best for all involved | ||
| Audio book: | Chapter House: Dune - Frank Herbert ☹️ | ||
Comments
Post a Comment